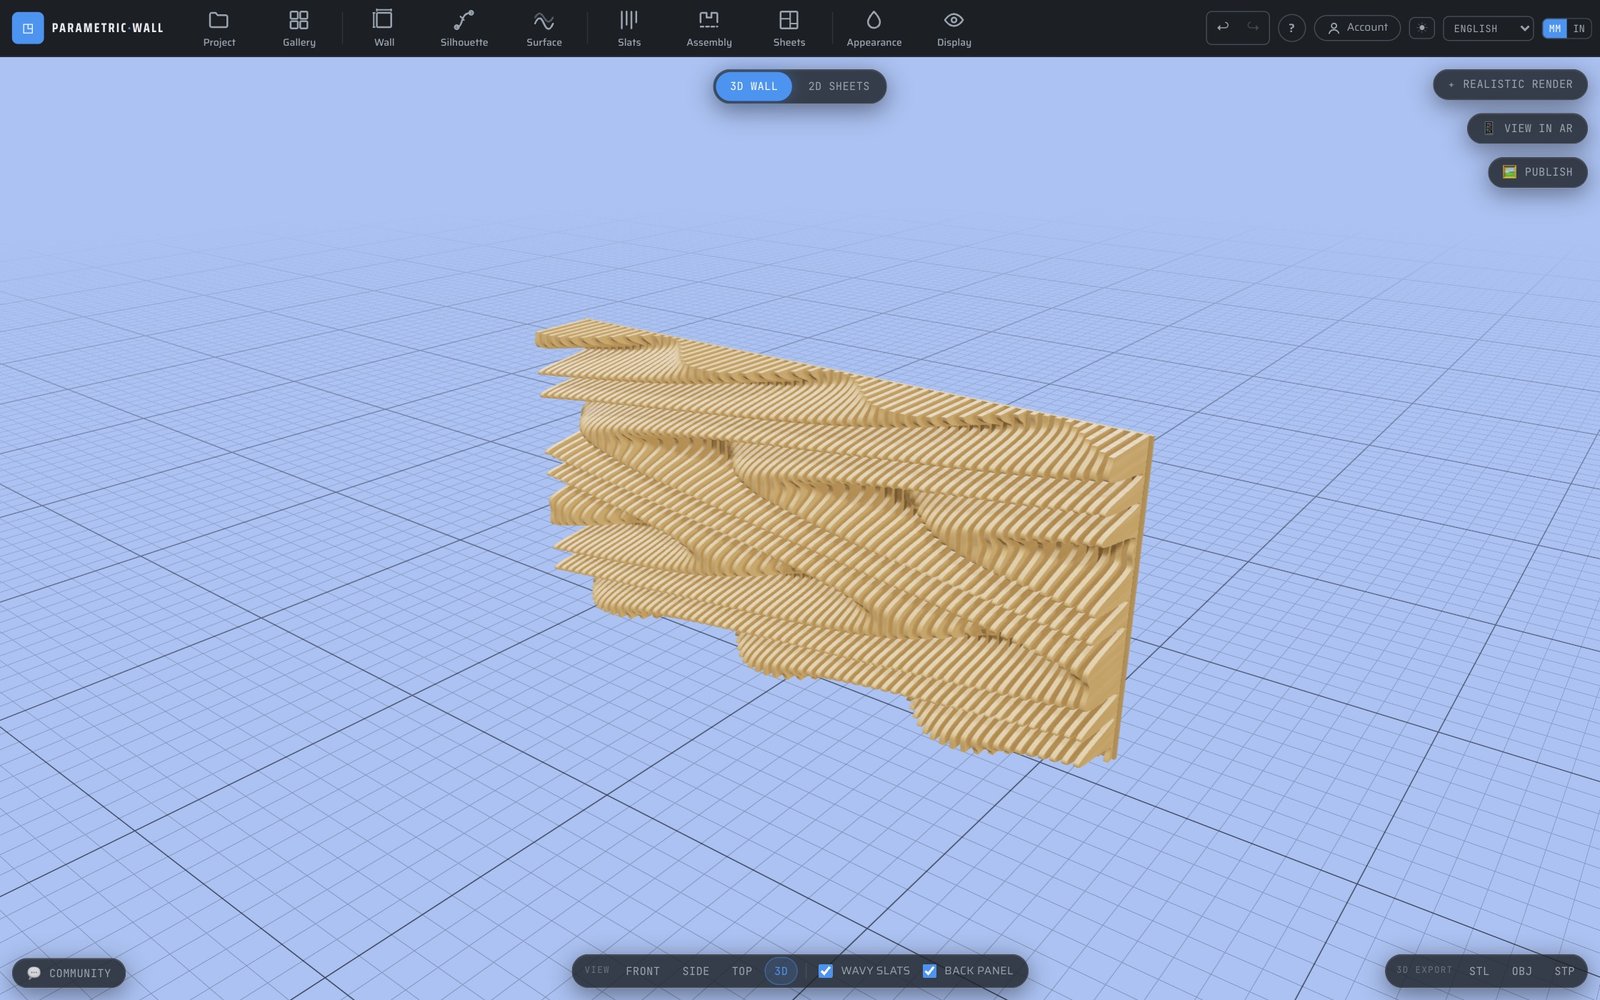
How to design a wood slat wall for CNC: the complete beginner's guide
To design a wood slat wall for CNC, start from the finished wall size, then pick your stock thickness (12–22 mm; it is also the visible slat width), a centre-to-centre spacing of about twice that for an equal gap, and a maximum relief depth. The software then slices the wall into numbered slats, nests them on your sheets and exports DXF, SVG or GRBL/Mach3 G-code — this guide walks through those five steps without any CAD.
What is a wood slat wall, and why is it everywhere?
A wood slat wall is a decorative panel made of repeated vertical or horizontal wood slats (also called lamellas or battens) mounted over a backing board. The regular rhythm of the slats catches light and shadow, adds warmth and texture, and gives a room a modern, high-end feel. When the depth of each slat follows a wave, curve or relief instead of staying flat, the panel becomes a sculptural wave wall or parametric wall — a true feature piece.
Slat walls are popular because they are versatile and relatively simple to produce on a CNC router or laser cutter. The same technique covers acoustic slat panels (which absorb and diffuse sound), fluted panels, headboards, room dividers and commercial feature walls. Designing them parametrically means you control every dimension and can adapt the same design to any wall size.
Step 1 — Plan your wall: dimensions, slat width, spacing and depth
Start with the finished size of your wall: width and height in millimetres or inches. Then decide the slat width and the spacing (gap) between slats. Narrow slats with tight spacing read as fine and detailed; wider slats with bigger gaps feel bold and use less material. A common starting point for a wood slat accent wall is slats around 20-40 mm wide with a similar gap.
Next comes the maximum relief depth — how far the slats project or how deep the wave carves into the panel. Greater depth creates dramatic shadow lines but needs thicker material and longer machining. In a parametric design tool you set width, height, slat spacing, thickness and depth directly and see the result live in 3D, so you can balance look, material cost and cut time before committing.
One detail catches almost everyone in Parametric Wall Studio: each slat is cut on edge from the sheet, so the face width you see equals the sheet thickness, and the spacing is measured centre to centre — 18 mm slats at 18 mm spacing touch. The design-to-cut guide shows what each slat setting changes, with the real gap displayed live.
Step 2 — Choose your material and thickness
The most common materials for CNC slat walls are MDF (cheap, flat, no grain, perfect for painted walls and acoustic panels), Baltic birch plywood (strong, light, with attractive exposed plies on the wave contours), and solid hardwoods like oak and walnut for premium projects. Softwoods such as pine are budget-friendly for large surfaces, and bamboo offers an eco-friendly, very hard alternative.
Panel thickness (typically 12, 15, 18 or 22 mm) drives both the look and the machining. Thicker panels allow deeper relief and stronger tenon-mortise joinery, but take more passes to cut. Match the thickness to your relief depth and to the router bit you own — our per-material machining guides list realistic feeds and speeds for each wood.
Step 3 — Design the relief with parametric waves
This is where a parametric wall generator shines. Instead of drawing every slat by hand, you shape a mathematical relief field and let the software apply it to all the slats at once. Compose wave layers (sine, radial, spiral, ripple, dome) with blend modes, add attractor points to pull the surface, load a heightmap image, or sculpt freely with a 3D brush.
You are not limited to rectangular walls either. A free-form silhouette engine lets you draw a flowing ribbon shape, a freehand Bezier outline, import an SVG, or trace an image — so your slat wall can follow any organic contour, not just a rectangle. Every change updates the live 3D preview instantly.
Step 4 — Slice into slats, nest and add joinery
Once the relief looks right, the tool slices the wall into individual numbered slats and lays them out (nests them) on standard sheet sizes to minimise waste. Automatic tenon-and-mortise joinery adds tenons to each slat and a matching mortised back panel, so the parts self-align during assembly — a huge time saver for a large slat wall.
Nesting and slicing by hand is tedious and error-prone; doing it parametrically guarantees every part is labelled and fits the sheet. You can tweak slat spacing or wall size and watch the nesting reorganise in real time.
Step 5 — Export cut files and G-code, then machine it
For a CNC router, export a clean DXF (R12) with separate cut and engrave layers; for a laser cutter, export SVG. Need editable CAD solids? Export STEP for Fusion 360 or SolidWorks, or STL/OBJ for 3D printing and rendering. With Parametric Wall Studio you can also generate ready-to-run GRBL/Mach3 G-code directly — with cutter radius compensation and holding tabs — and check the toolpath in a built-in machining simulator before you cut. No separate CAM software required.
That is the whole pipeline: design the relief, choose material and slat spacing, slice and nest, then export DXF/SVG/STEP or G-code and cut. A parametric browser tool lets a complete beginner go from idea to a machined wood slat wall in an afternoon.
Two shortcuts: start from one of the 30 ready-made templates rather than a blank wall, and keep every export and G-code setting explained open next to the studio the first time you cut.
Read next
Tools & guides
Ready to try it?
The studio opens on this guide's model — resize it in two settings.
Design your slat wall now — free →